Rainbow Cake: Part 2. Decorating the cake, and eating it too ❤
 start by brushing water onto the outside of the fondant to make it sticky...
photographed by Gail Albert Halaban.
 stick the tiny pieces of sugar paste onto the fondant covered cake to create a mosaic
 (fun for all ages)

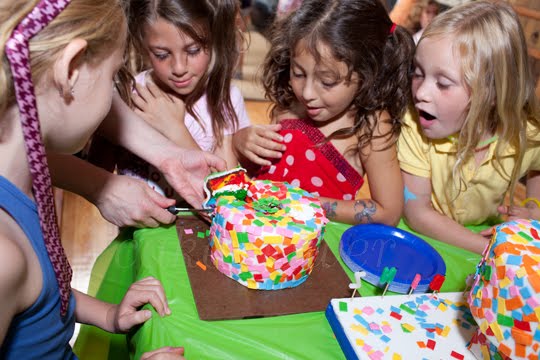
✫We made five cakes of varying sizes, from 4" to 7" round, and had the kids work in groups of 4 or 5 to decorate each little cake. It works just as well with ONE cake. Small groups take turns decorating one larger cake. While some kids work on the cake, others play games


 getting ready to sing Happy Birthday!
 make a wish...


Rainbow Cake Instructions: 1. Start with your favorite cake: baked, filled and frosted (click here for the rainbow inside the cake recipe: Omnomicon's How to make a Rainbow Cake!) You can choose what ever size and shape cake works for you and the number of guests you're having.
2. Cover your cake in fondant. *tip: KEEP IT COLD: ) I refrigerate cakes thoroughly before covering in fondant, and then also refrigerate the fondant-covered cake overnight. If you decorate it cold, it will be a firmer and easier to work on. (yes! it is OK to refrigerate fondanted cakes)
3. Color sugar-paste, also called gum paste, with 5-7 different gel colors. *tip: you can also use rolled fondant to make the cut squares, or even pre-colored fondant.
4. Using a rolling pin, roll out sugar-paste very thin onto a plastic mat or flexible cutting board.
*tip: I put the mat with the rolled out paste into the freezer for anywhere from 5 to 30 minutes. (Longer is fine too, depending on what else I'm working on). The chilled sugar paste is easier to cut.
5. Use a pastry or pizza wheel to cut into small square pieces, and let dry flat for a few hours or days, depending on how much lead time you have. Until they are set up enough to handle easily and don't stick to each other when poured in a bowl.
6. Divide the colors into separate bowls.
7. Wet the outside of the fondant with a brush or paper towel. It should be wet enough to make the surface tacky so that the squares will stick to it.
8. Have fun sticking the squares to the fondant!
We talked to the kids about mosaics and patterns and shapes, but what they most wanted to do was make random festive confetti patterns.
ONe laSt EASIER to prepare VERSION for the road: You can also do this project without covering the cake in fondant. Stick the sugar paste squares or store bought confetti sprinkles to buttercream frosting, (although it could get a little messy for little fingers).
❈
The only bad thing I could ever say about working with my friend Gail's photographs was that she makes the "editing" part of the job nearly impossible, because I love her pictures and I can never choose. To see more of her work: click here
Fantastic Idea!!
ReplyDelete